
How to delete your Twitter account and protect your data

Whether it’s because a move Twitter itself made that you’re not fond of, a decision to move to another platform instead, or you’ve just had enough of social media as a whole, there are plenty of reasons why you’d want to leave Twitter.
Unlike most sites that we frequent on the web, leaving Twitter isn’t as simple as signing off for the final time and never going back. That’s because of the massive amounts of data sites like this collect about us while we’re using them. To ensure that Twitter won’t continue exploiting your data after you’ve gone, you need to take the proper steps to fully delete your account and all of the data tied to it on your way out.
In this guide, we’ll explain how to do just that, as well as how to take all of your valuable data with you. Follow along with the steps here and you’ll be done with Twitter. Or, if you change your mind and decide you just can’t quit the microblogging service, we’ll tell you how to undo the process as well.
Step 1: Deactivating third-party services
Unlike some other sites that let you immediately delete your information and close down your account, Twitter requires either a 30-day or 12-month deactivation timeframe when you decide to delete your account. If a third-party app that you’ve linked to your Twitter account signs into your Twitter account during that time, your account can be reactivated and will continue to remain active even after the 30 days or 12 months have passed.
More: Twitter accepts Elon Musk’s $44 billion buyout
Because of this, the first step you should take when deciding to delete your account is to unlink all third-party services tied to your account. The steps to doing that follow:
-
Log into your Twitter account,
-
If you’re on a desktop browser, click More on the left side, then Settings and privacy. If you’re on the Twitter mobile app, click on your profile pic on the top left, then Settings and privacy.
-
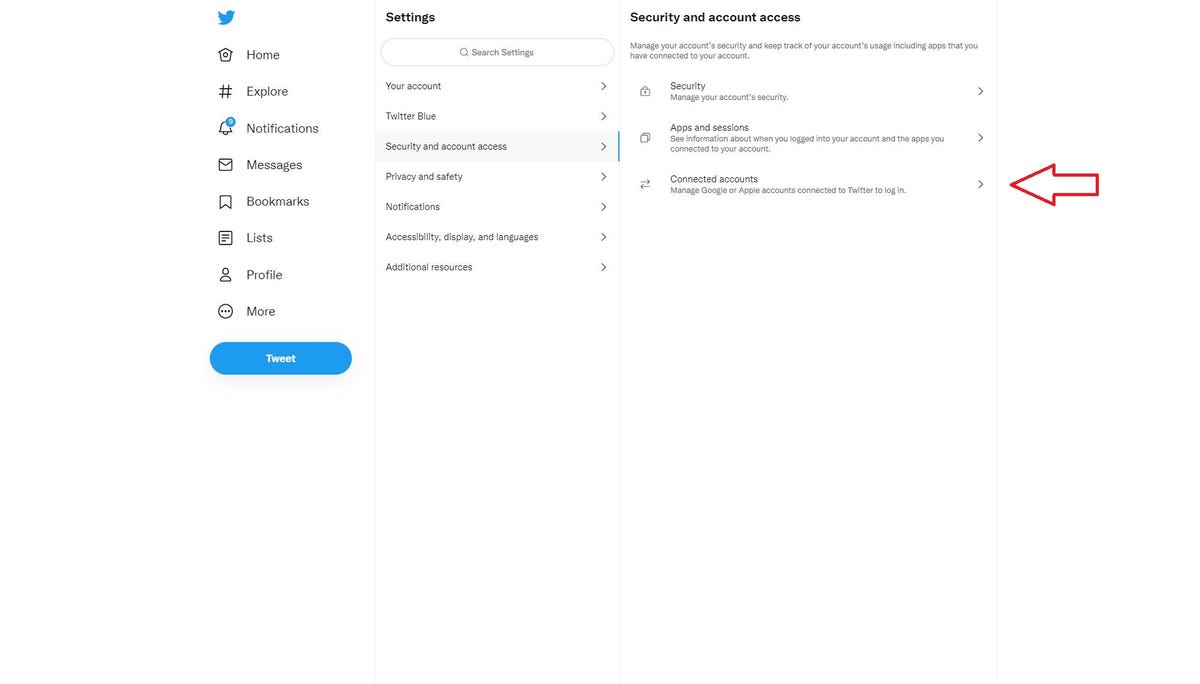
Once inside, click or tap Security and account access, then Apps and sessions, and finally Connected apps.
-
Twitter will provide a list of all of the third-party apps and services that are connected to your account. You’ll need to select each one, then click Revoke app permissions.
Once you’ve done this, you’re ready to actually delete your account without any worry that some forgotten app you attached to your Twitter profile years ago will accidentally foil your attempt to leave.
More: Twitter founder Jack Dorsey regrets playing a role in centralizing the internet
Step 2: Archiving your data (optional)
When your deactivated Twitter account reaches the 30-day or 12-month mark (whichever you choose), all of your data will be deleted from the social network’s servers, permanently. However, if you’d like to retain your data, Twitter provides a way to download an archive of everything tied to your account that remains on its servers.
It may not seem like your Twitter data will be too valuable in the long run. But, if you ever need to access a link that you shared (or was shared with you), you need proof of some previous exchange, or you just want a way to take a trip down memory lane, you might as well go through this easy step to ensure that your data is available to you in the future.
More: How to delete your Facebook account for good
For this bit, you’ll need to use the Twitter website. None of its mobile apps offer this option. The process is almost identical whether you access the website via desktop browser or mobile browser. The steps of the process follow:
-
Open your desktop or mobile browser.
-
Navigate to Twitter.com and click on More on the left side.
-
Then click on Settings and privacy.
-
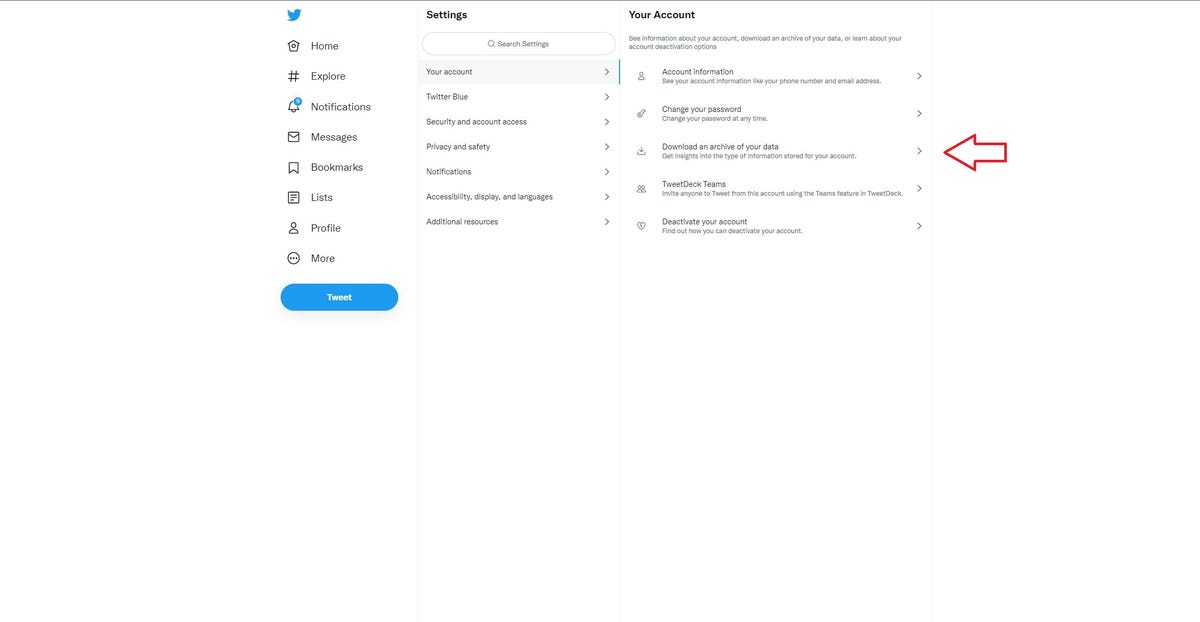
Once inside, click on Your account, then click on Download an archive of your data.
-
You may need to enter your password at this point, then you’ll be able to click Request archive.
Once you’ve done this, you’ll receive a notification that the process can take up to 24 hours for processing. Once the archive is ready, you’ll receive a mobile push notification via your Twitter mobile app, and an email.
Both notifications will provide a link that will automatically take you to your Settings page on the Twitter website. There you can download the prepared archive of your data.
More: How to back up your Gmail: The ultimate guide
What you’ll actually download is a Zip file that you can unzip/uncompress into a folder with two important items inside: an HTML file titled Your Archive and a Data folder that contains all of the media you posted to Twitter, such as uploaded videos, images, and animated .gifs.
The HTML file will open in your browser, where you’ll be able to navigate through it much like you would the Twitter website.
The Data folder can be navigated like any folder on your desktop or smartphone. Within it, you can play/view your media locally, assuming the media type is supported by your current device.
Once this is done, you’ve got your data and you can proceed to the final step. If anything within that data is precious to you, we’d highly recommend that you back it up, either locally, or to a cloud storage service of your choice.
Next, let’s finally get rid of that account.
More: How to delete yourself from internet search results and hide your identity online
Step 3: Deleting your account
Because this process differs somewhat between doing it on your PC or doing it on your phone, we’ll describe each scenario individually.
Deleting your account on your PC:
-
Sign into Twitter.com in your desktop browser.
-
Click More on the left side.
-
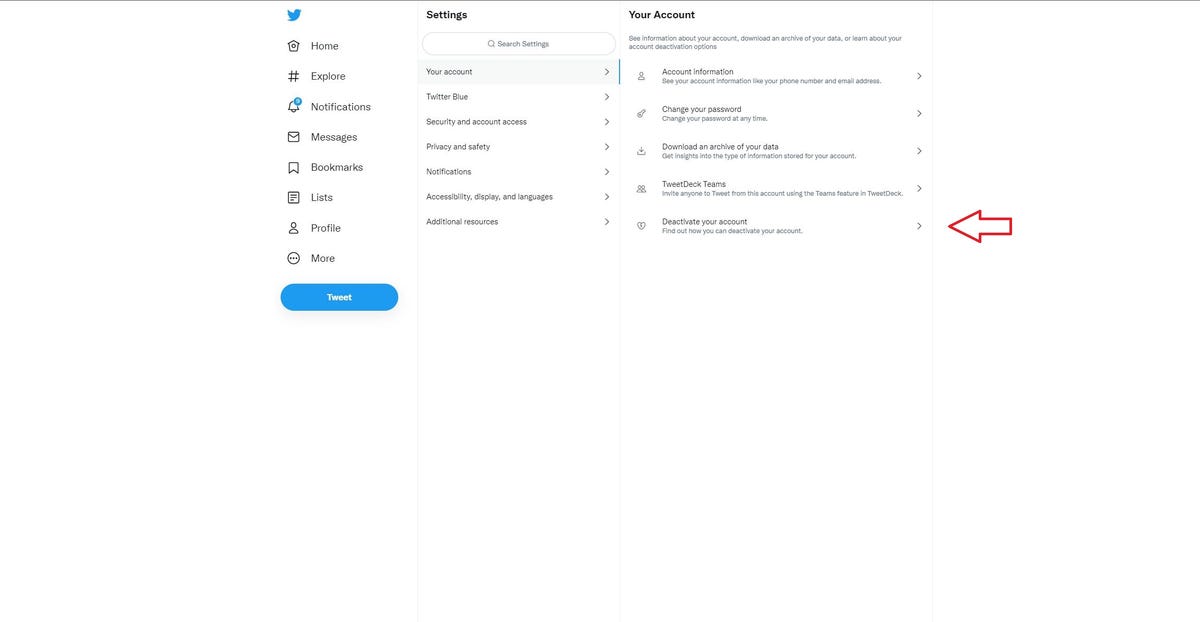
Click Settings and privacy and look for the Your account section.
-
Within there, click Deactivate your account.
-
At this point, you’ll be presented with two “reactivation” periods: 30 days or 12 months. It’s important you choose carefully because, once this period expires, your account and all of its data will be gone forever.
If you think it’s possible you might change your mind down the road, choosing the 12-month option might be best for you. Or, if you’re certain you’d like to make your exit as soon as possible choose 30-days.
-
Once you’ve chosen, click Deactivate.
-
You’ll have to enter your password at this point, and confirm your decision one final time by clicking Deactivate account one last time.
Deleting your account on mobile:
-
Sign into your Twitter mobile app.
-
Tap on your profile icon in the top left corner.
-
Tap Settings and Privacy in the pop-out menu.
-
Within there, tap Your account and then Deactivate your account.
-
At this point, you’ll be presented with two “reactivation” periods: 30 days or 12 months. It’s important you choose carefully because, once this period expires, your account and all of its data will be gone forever.
If you think it’s possible you might change your mind down the road, choosing the 12-month option might be best for you. Or, if you’re certain you’d like to make your exit as soon as possible choose 30-days.
-
Once you’ve chosen, click Deactivate.
-
You’ll have to enter your password at this point, and confirm your decision one final time by clicking Deactivate account one last time.
Once you’ve run through this process on desktop or mobile, just wait out your chosen reactivation period. At the end of 30 days or 12 months, your account, and all of its accompanying data, will be deleted forever. However, if you change your mind within the aforementioned timeframes, read on to find out how to reactivate your Twitter account.
More: Cybersecurity 101: Protect your privacy from hackers, spies, and the government
Reactivating your Twitter account
Unsurprisingly, Twitter makes the process of reactivating your Twitter account much easier than archiving it or deleting it. All you’ll need to do is log into your account within 30 days or 12 months (whichever you chose when deactivating it). Once you’re logged in, you’ll receive a notice asking if you want to reactivate your account. If you choose Yes, you’ll be immediately directed to your restored Home page.
It might take some time for Twitter to fully restore all of your account’s contents, including followers, media, and past tweets and DMs, so don’t panic if something is missing when you land back on your homepage.
Coming back to Twitter after deleting your account
One final note. If you choose, somewhere down the road, to return to Twitter after your 30-day or 12-month period has expired, you’ll need to sign up for a completely new account.
If you’d like to reuse the same handle you had previously, you’ll have to hope that no one chose it as their username in the meantime. Once an account is deleted, anyone signing up can claim that account’s username as their own. If someone selected your username while you were away, you’re out of luck and will need to choose something new.
Please note, this doesn’t apply if you’re within your reactivation period. Twitter keeps your username reserved for you until that reactivation period expires.
READ MORE HERE